Relearning CSS: Part Two
As promised, here is part two covering sizing units, the box model and links.
If you want to go back and read part one, which covers selectors, colours and lists, click here.
Sizing Units
px: pixels
This is the most common metric within CSS styles sheets. It’s a standard way to add a size to a font, height, width etc.
Values of px are fixed. So whilst using pixels can be handy, it’s not always the best option for responsive layouts (more on that in a later post).
p {
  font-size: 50px
}
header {
width: 100px;
height: 100px
}em: think fonts
This is a relative size that is usually uses for font-size. For example 2em means 2 times the size of the current font size.
div {
  font-size: 50px;
}

p {
  font-size: 0.5em;
}
<div>
<p>Here the font size is actually 25px.</p>
<p>This is because 50x0.5.</p>
</div>See the Pen Part Two of Relearning CSS by ummadev (@ummadev) on CodePen.
rem: think root fonts
This is the root font. Where em was for fonts in general rem refers to root, hence the r in front of em.
Let’s say the font-size of the html page* is set to 10px. If you had a div and added a style of font-size: 2rem, this will mean the font-size within that div will be two times the size of the root, thus the font size will be 20px.
* reminder: everything you can see on the page is contained within the <body></body> tags
html {
  font-size: 10px;
}

div {
  font-size: 2rem;
}
<body>
<div>The font will be 20px</div>
</body>vh: viewport height
Dependent on the height of the browser. vh is useful when building responsive layouts.
div {
  height: 5vh;
}
vw: viewport width
Dependent on the width of the browser. vw is useful when building responsive layouts.
div {
  width: 5vh;
}
%: percentage
Percentages usage are usually relative to the size that is set by current selectors on the page.
Responsive and relative, not as widely used. Usually this metric is used to size padding on a page or height/width of a certain element.
div {
  width: 50%;
  height: 50%
}
To get a round cirlce for an image you would do the above but use the img tag. This will be covered in greater detail later on.
Calculations
You can create calucation variables for things such as height and width.
div {
  width: calc(100% - 10px);
}
The Box Model
Right click on an element on a page and click select inspect. You should be able to be abel to see two parts. The first part will have HTML code and the second will have the styles. Within styles, scroll to the bottom and you will be able to see an image that is a square with the labels margin, border, padding and another box that shows the dimensions of the element.
Margin
When applying margin styles, you are changing where that element is positioned on the page.
This style will create a margin on all sides of the elemnt of 10px. This means that it will move 10px to the left, right, up and down of the page.
div {
  margin: 10px;
}
If you only wanted to specifically add a margin to left, right, top or bottom you would use the following:
margin-left
margin-right
margin-top
margin-bottom
There is also a short hand to write all of these styles in one place using just margin.
div {
  margin: 10px 20px 30px 40px;
}
So how do you know which numbers refer to margin-left or margin-bottom? The best way to think about these numbers is like a clock. The first number refers to margin-top, the second is margin-right, the third is margin-bottom and lastly margin-left.
Border
Most elements won’t have a border around them and it isn’t always necessary to define a border or border:none within your CSS.
div {
  border: 1px solid red;
}
There are a number of different types of borders:
solid
double
dotted
dashed
ridge
none
Like margin, you can have border-left, border-right, border-top and border-bottom. The shorthand for margin doesn’t work with border.
Padding
The style closest to the actual element is padding. Padding is used to add spacing within the element.
div {
  padding: 10px;
}
See the Pen Part Two of Relearning Css (II) by ummadev (@ummadev) on CodePen.
Like margin, you can apply styles specifically to left, right, top or bottom. The shorthand like margin, also applies to the padding style.
Links
There are a number of ways links can be styled. A few of these are covered below.
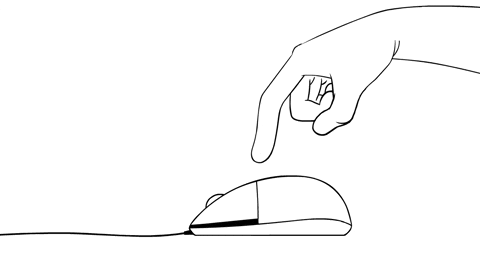
Hover
If you want to add a hover effect, this means a style that appears when the mouse covers the link, you will need to append :hover onto the link style.
a:hover {
  backround: green;
}
Visited
Similar to hover, a style can be added once you have visited a link, i.e. clicked it.
a:visited {
  color: red;
}
Active
An active link means that you are currently left clicking on the link, which causes the style to be applied.
a:active {
  color: yellow;
}
Part three will cover images, z-index, positioning and when to use !important.